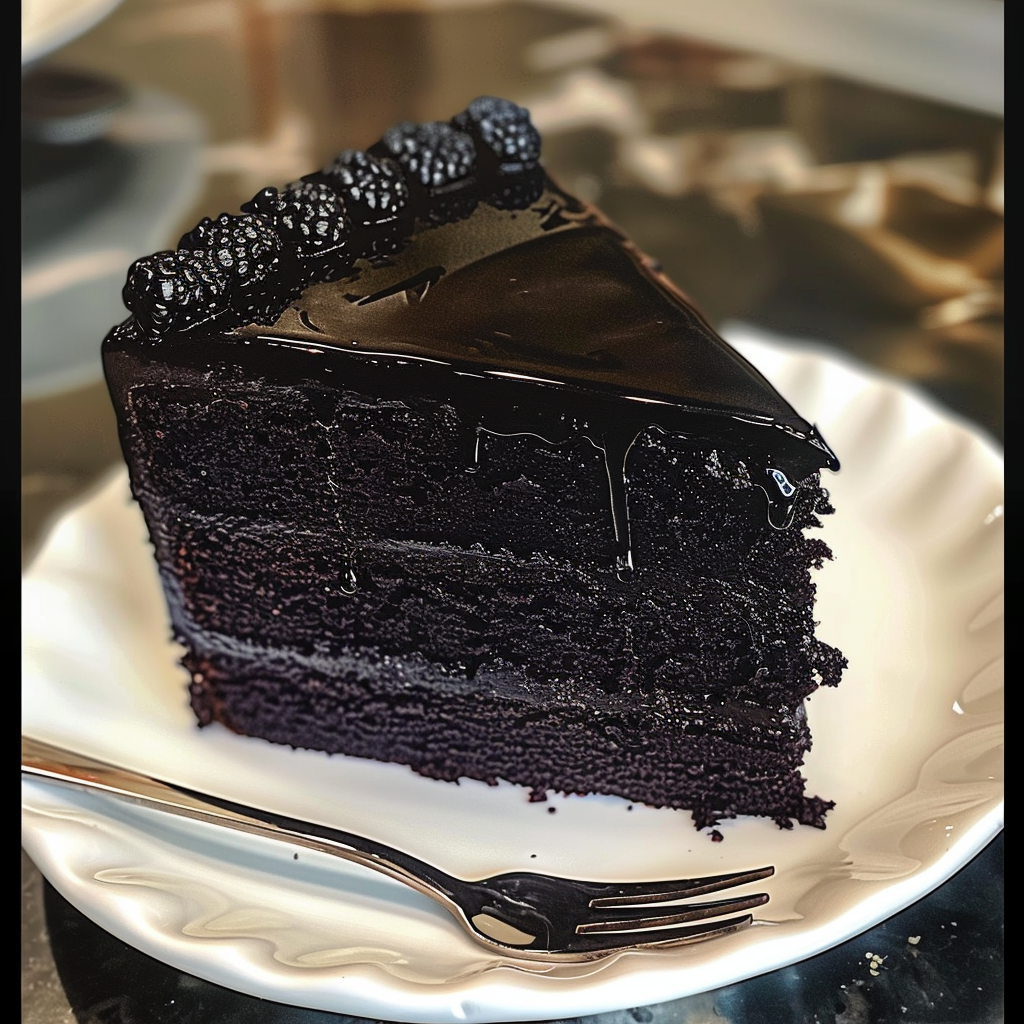
Midnight Elegance Cake
Discover the allure of our Black Velvet Cake 🖤, a masterpiece of rich flavors and elegant presentation. Known as the Midnight Elegance Cake, this dessert combines the deep, luxurious taste of black cocoa with the vibrancy of fresh berries and shimmering sprinkles. Perfect for special occasions or as a decadent treat, this cake promises an unforgettable experience with every slice.
Ingredients :
For the Cake:
- 1.5 cups (330g/12oz) brown sugar, firmly packed
- 1 3/4 cups (260g/9oz) cake flour
- 1 cup (100g/3.5oz) black cocoa
- 2 teaspoons bicarbonate of soda
- 1 teaspoon baking powder
- 2 eggs, room temperature
- 1 cup (250ml/8.8floz) buttermilk
- 1 cup (250ml/8.8floz) hot water or coffee
- 1/2 cup (125ml/4.4floz) neutral flavored oil (like grapeseed or rice bran)
- 2 teaspoons vanilla extract
- 100g (3.5oz) dark chocolate, finely chopped
For the Black Cocoa Buttercream:
- 375g (13.3oz) butter, room temperature
- 190g (6.7oz) caster sugar
- 115ml (4floz) water, room temperature
- 3/4 cup black cocoa
- 1 teaspoon vanilla extract
To Decorate:
- Black cherries
- Blackberries
- Purple and gold sprinkles
Directions:
- Preparation: Butter and line two round baking tins (20cm/8inch and 10cm/4inch high). Preheat oven to 160°C (320°F).
- Cake Batter: Whisk together brown sugar, cake flour, black cocoa, bicarbonate of soda, and baking powder. In another container, blend buttermilk, oil, and vanilla. Beat in eggs, then incorporate hot water or coffee. Gradually mix wet ingredients into dry, adding chopped dark chocolate last.
- Baking: Pour batter into tins and bake for 30 minutes, or until a toothpick inserted comes out clean.
- Buttercream: With a mixer on low, beat butter, sugar, and cocoa for 1 minute. Increase speed and continue beating, gradually adding water and vanilla until smooth and free of grittiness.
- Assembly: Once cakes have cooled, slice horizontally in half. Spread buttercream between layers and around the exterior. For detailed decoration, use a 1A piping tip to create dollops around the edge.
- Finishing Touches: Garnish with black cherries, blackberries, and sprinkles for a visually stunning presentation.
Prep Time: 35 minutes | Cooking Time: 35 minutes | Total Time: 70 minutes
Additional Tips for the Perfect Black Velvet Cake :
- Ingredient Temperature: Ensure all your ingredients, especially eggs and buttermilk, are at room temperature to achieve a smooth, uniform batter.
- Mixing: When combining your wet and dry ingredients, mix until just combined to avoid overworking the batter, which can result in a denser cake.
- Baking Tins: If you don’t have the exact size tins mentioned, you can use different sizes but adjust the baking time accordingly.
- Cake Testing: Besides using a toothpick to test if your cake is done, you can gently press the surface – it should spring back if it’s fully baked.
- Cooling: Allow the cakes to cool in the tins for about 10 minutes before transferring them to a wire rack. This helps them set and makes them easier to remove from the tins.
Storage Instructions :
Store any leftovers in an airtight container at room temperature for up to 3 days. For longer storage, refrigerate for up to a week, though be aware the fridge may dry out the cake slightly. For the best texture, let it come to room temperature before serving if refrigerated.
Serving Suggestions :
- Coffee or Espresso: The deep chocolate flavor of this cake pairs wonderfully with the richness of coffee.
- Dessert Wine: For an adult gathering, serve slices of cake with a dessert wine or a fortified wine like port.
- Fresh Berries: While the cake is adorned with black cherries and blackberries, serving it with a side of fresh raspberries or strawberries can add a bright, acidic contrast to the rich chocolate.
Happy Cooking !
Looks delicious. Have to try.
I love this recipe.
Please put a Print Recipe function on your site like everyone else. It sucks when we have to use the Microsoft print function because it prints the advertisement, too. Not to mention the waste of ink and paper this causes.
Is that a mirror glaze on top?
Looks fabulous but the top in the picture looks like ganache… not buttercream. Am I wrong?
When sugar and butter are creamed together, the sugar crystals get “pushed” into the butter and create “holes” in the butter, giving it the airy, fluffy texture we love. There’s a lot of water in butter, too, so as the holes are forming, the water is busy melting the sugar crystals. (That’s why we want everything to be room temperature.) When the sugar in those tiny holes are melted by the water in the butter, it microscopically reforms as the “walls” of the holes. So imagine painting the inside of a balloon with melted sugar, letting the sugar harden, and then popping the balloon, leaving the fragile sugar “wall” in its place. That’s what perfectly creamed butter and sugar looks like under a microscope.
But now, by adding 4oz of water, which you don’t usually see in buttercream icing, we melt those fragile sugar-walled bubbles and they collapse, considerably changing the texture of the finished product.
The chemical reaction of whipping the the butter to melt the sugar creates heat. When you add the neutral- temperature water and continue to whip the mixture, we create more heat, melting even more sugar.
For all intents and purposes, we are making a countertop ganache, albeit a less fluid one. We’re not using the stovetop to melt or heat the ingredients, but we are using heat to break down the sugar.
This is what gives this formerly high-and-fluffy buttercream icing the look of thin-and-glossy ganache.
Ohhhh
Hi Looking at the buttercream… I’ve never used castor sugar in buttercream. Can you use icing sugar?
Oh my. That looks delicious. I need to try this. I’ve never seen black cocoa. What do we get it?:
You can get it online! Amazon etc… It’s what they use in Oreas & Texas Sheet cakes 😊 😄 😁
You can find it on Amazon
If I’m cutting each cake horizontally, won’t I have 4 layers? The picture shows 3.
dolores omnis animi nihil tempore est vero eius quod sequi assumenda eos sed necessitatibus consequatur id atque. fugiat eum ex modi in ullam voluptatem tempora commodi ipsum culpa ut.
Can you use self rising flour instead of cake flour , salt and baking soda?
Why doesn’t the recipe ingredients say how many eggs to use?